
Documentation
Everything you need to know about RuneSpoke Hub
Connect your tools
RuneSpoke is a bring-your-own-everything platform: your code stays on GitHub, your apps deploy to your own AWS account. This guide covers connecting both. The rule throughout is the same - one button per provider, and we only ever store an encrypted token. We never see your password.
How connections are stored
One button
OAuth providers are a single click. You never paste a Client ID, Client Secret, or callback URL - RuneSpoke handles the handshake.
We never see your password
OAuth means you authenticate on the provider's own site. RuneSpoke receives a scoped token back - not your credentials.
Encrypted at rest
Every token and key lives in an AES-256-GCM credentials vault. It is decrypted only at the moment it is used, and you can rotate it anytime.

Connect GitHub
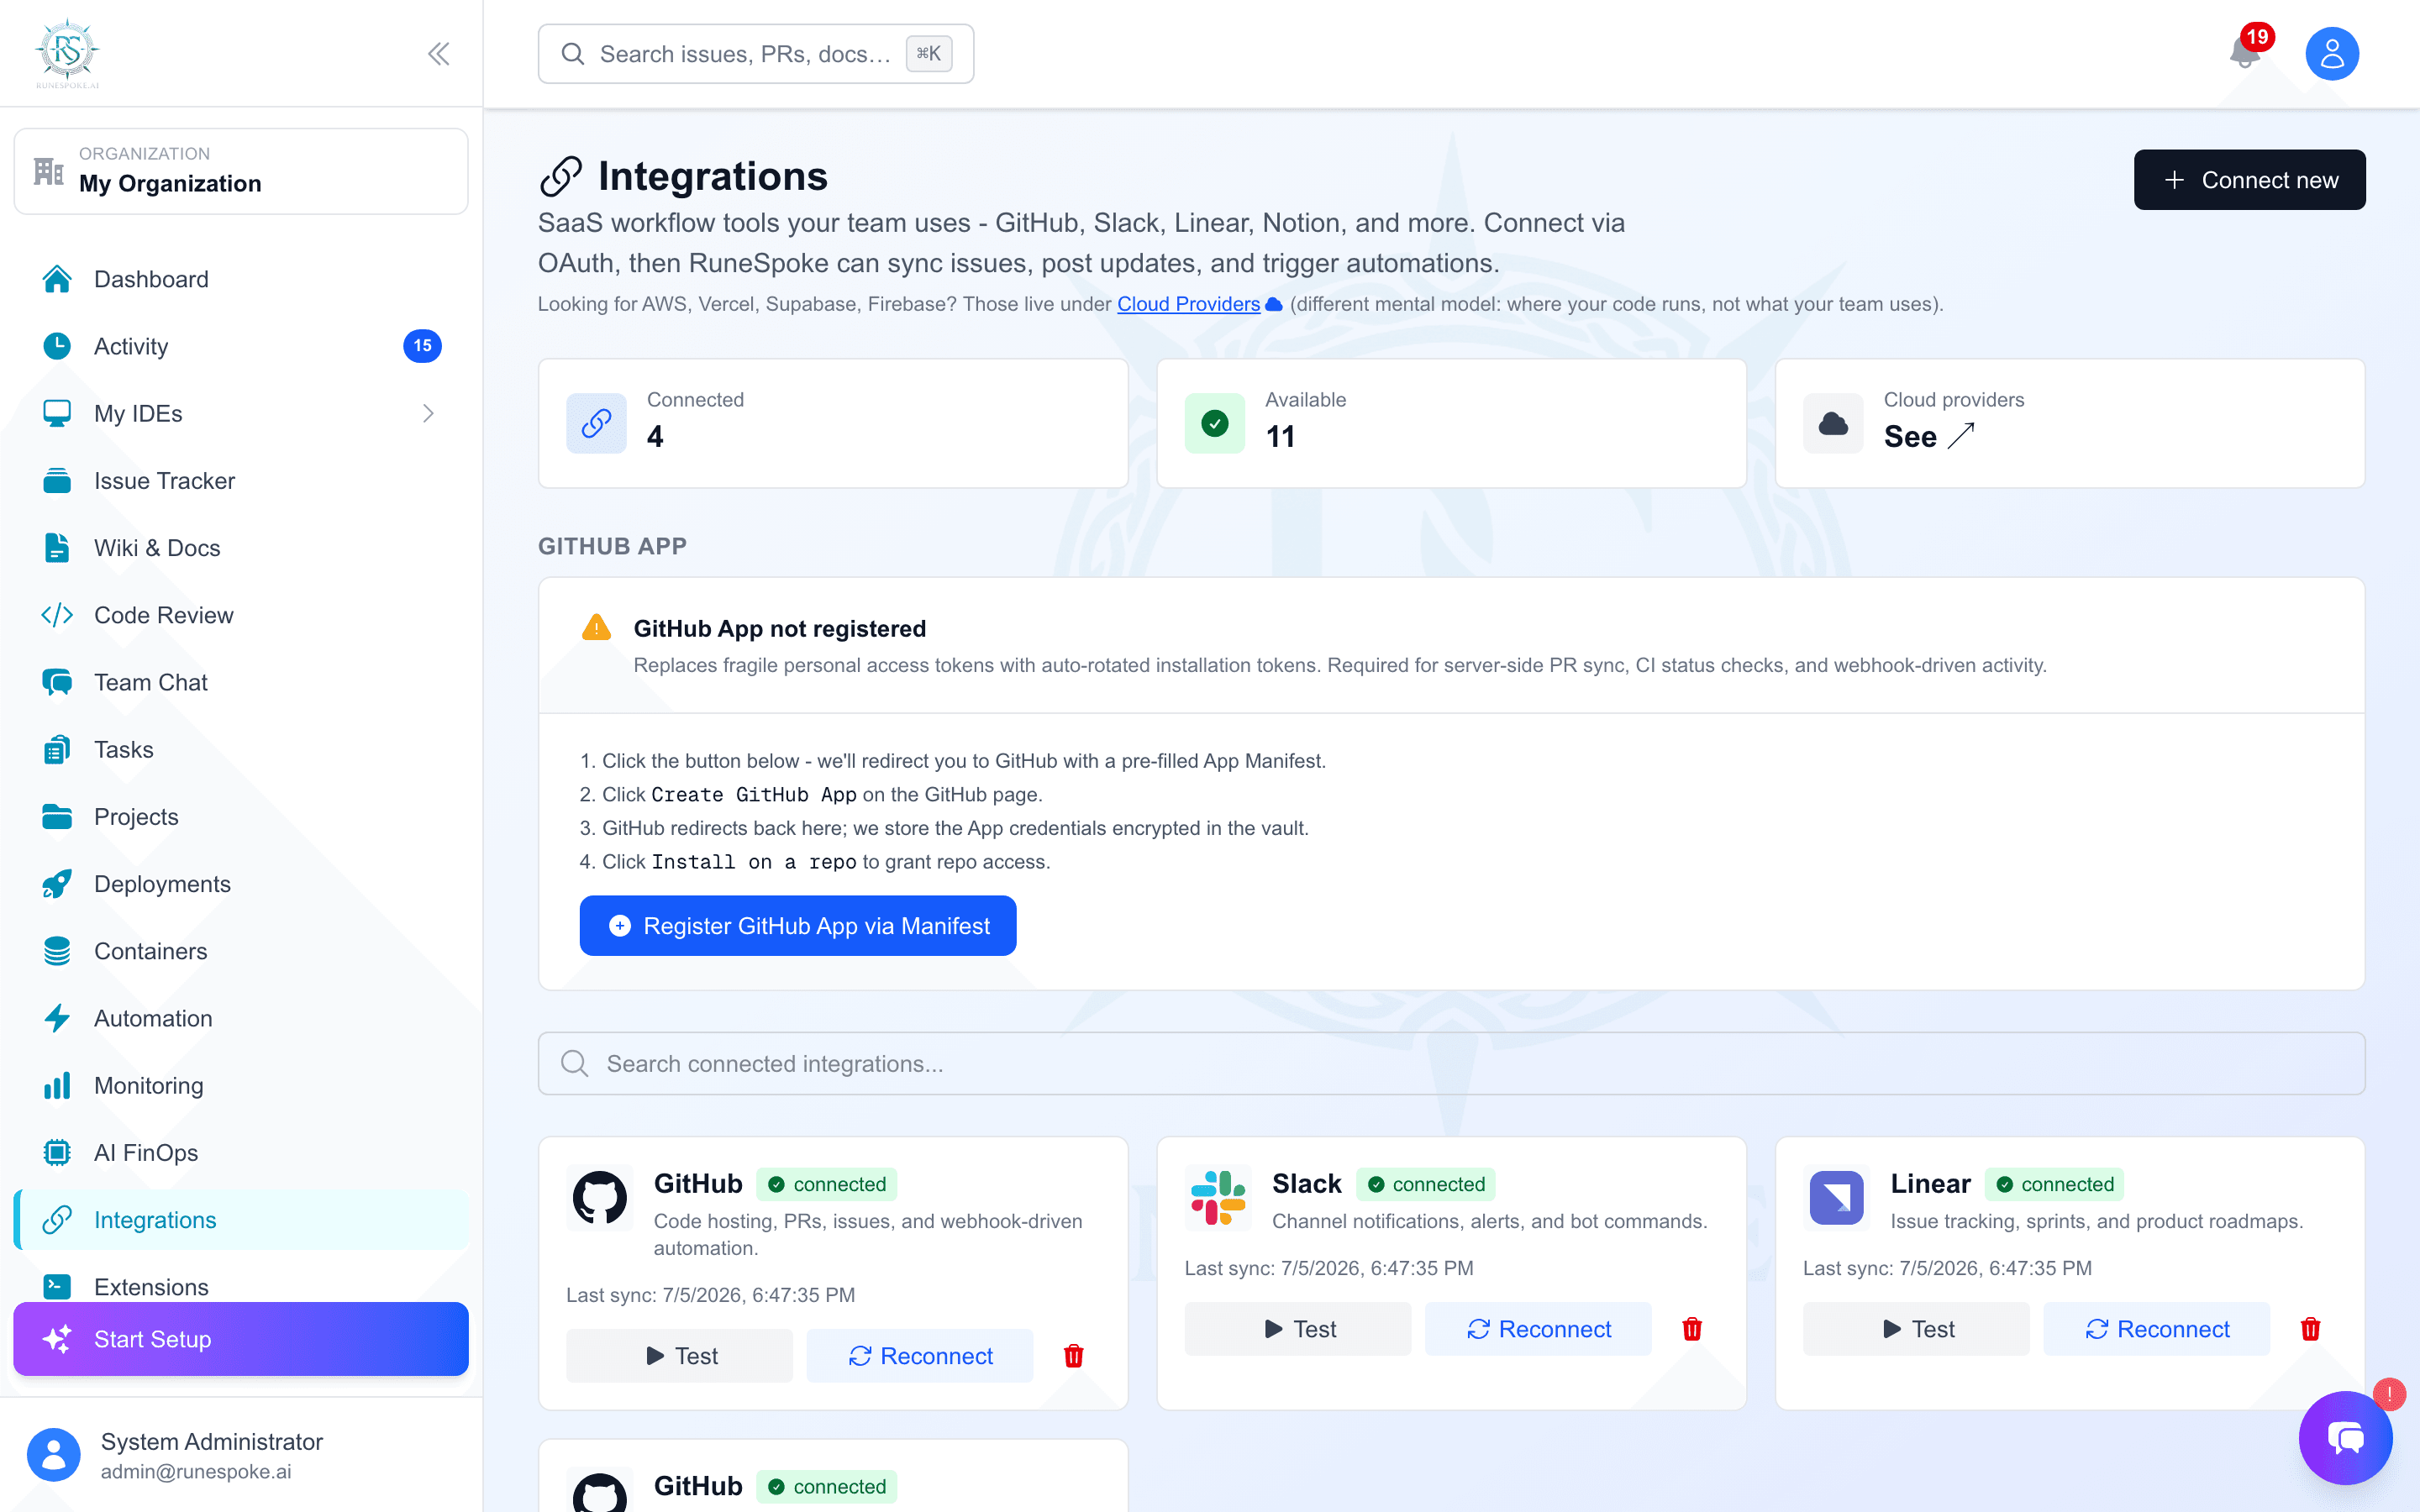
GitHub is where your code and pull requests live, so it powers code review, the PR approval gate on deploys, and issue mirroring. You connect it from the Integrations page. There are two paths - pick whichever fits your org.
One-click OAuth
On the Integrations page, click Connect to GitHub. You are sent to GitHub to authorize, and you come straight back connected. RuneSpoke stores the encrypted access token in the vault - nothing else.
Go to IntegrationsGitHub App via manifest
If you want fine-grained, per-repository access and webhooks, install the RuneSpoke GitHub App. RuneSpoke generates the app from a manifest, so you get a guided install flow rather than hand-configuring permissions. You pick which repositories it can see - all of them, or a specific list.
Typical scopes
- • Read: repository contents and metadata
- • Write: pull requests, issues, status checks
- • Webhooks: push, pull_request, check_run events

Connect AWS
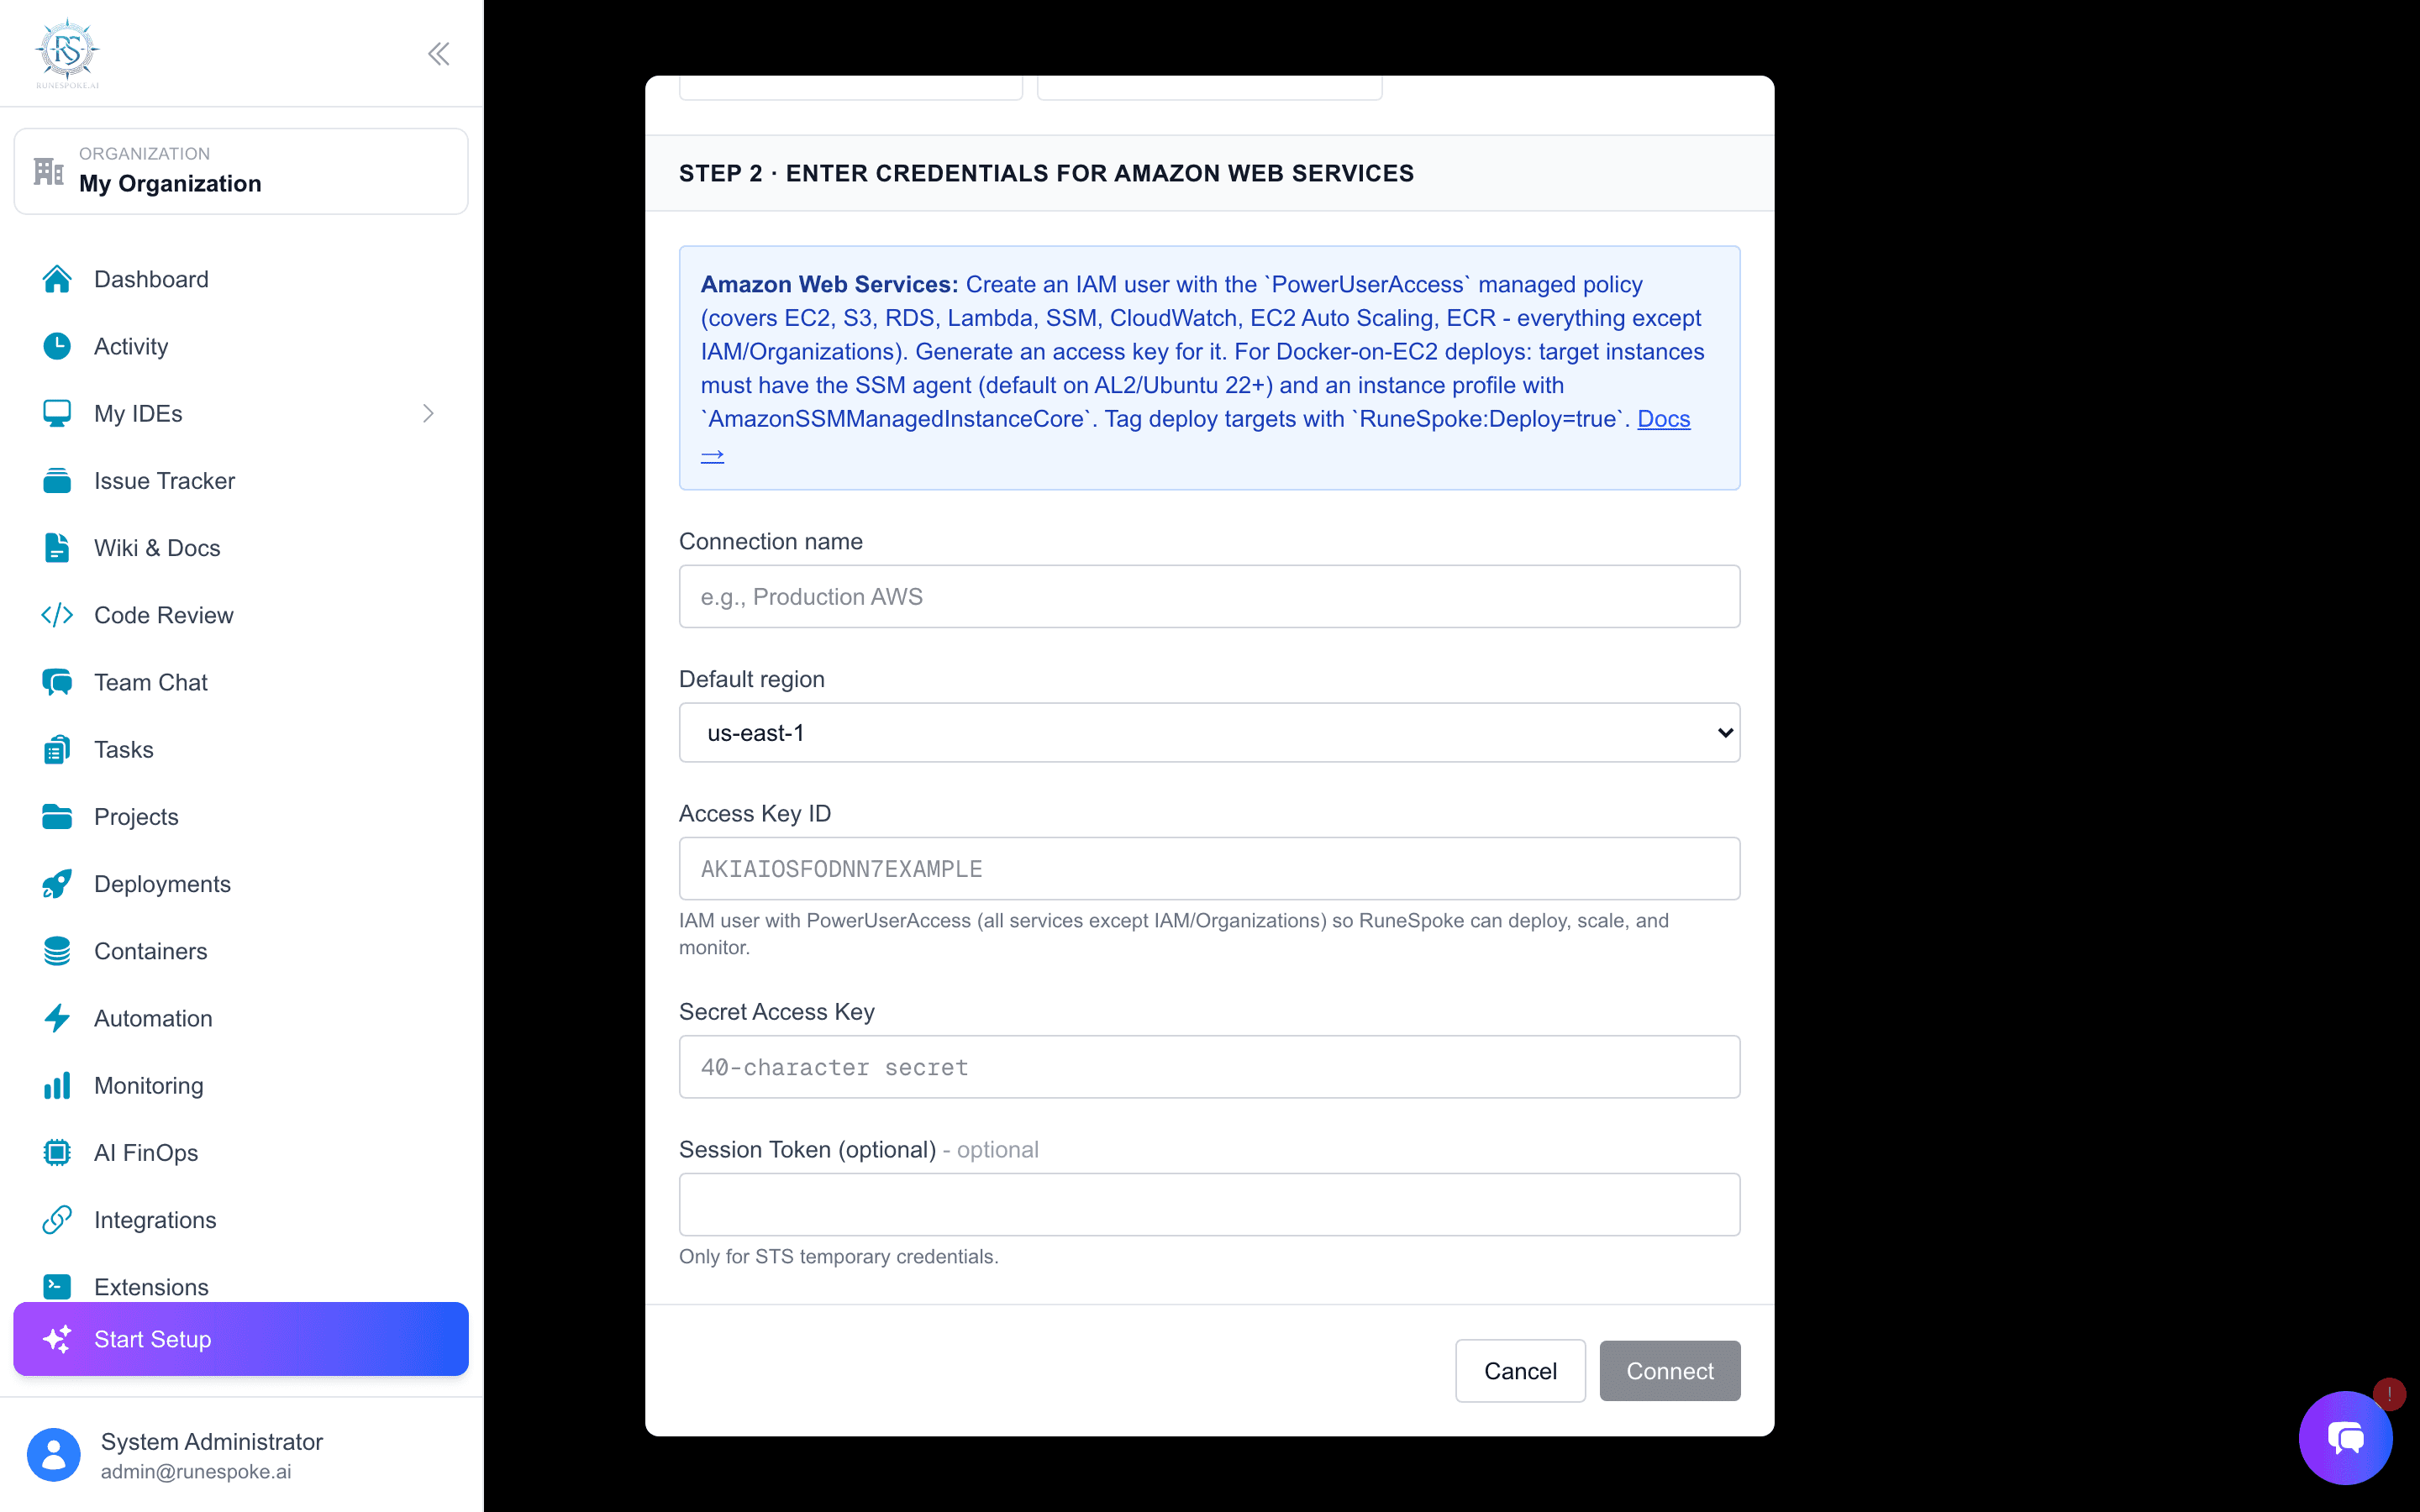
AWS is where your apps run, so it powers deployments, scaling, logs, and metrics. You connect it from the Cloud Providers screen. AWS does not offer a consumer OAuth flow, so you provide an IAM Access Key and Secret - which RuneSpoke encrypts in the same vault and decrypts only when a deploy or read actually runs.
Create an IAM user
In your AWS console, create an IAM user with programmatic access. Grant it the permissions RuneSpoke needs for the operations you want - inventory and metrics are read-only; deploys add ssm:SendCommand. PowerUserAccess covers everything.
Add the Access Key and Secret
On the Cloud Providers screen, pick AWS and paste the Access Key ID and Secret Access Key (plus region). RuneSpoke writes them to the AES-256-GCM vault immediately - they are never logged and never shown back to you in full.
Rotate the key anytime without dropping the connection.
Verify the connection
RuneSpoke runs an STS GetCallerIdentity probe to confirm the credentials work before saving. Once it is green, your EC2, S3, RDS, and Lambda inventory syncs and you can deploy.
To deploy, the target EC2 instance also needs the SSM agent, the AmazonSSMManagedInstanceCore policy, and the tag RuneSpoke:Deploy=true. See the Deployments guide for the full pipeline.